Last Updated on 04/07/2024 by Glynn Willard
Don’t feel like reading? Listen to the audio version of this blog.
Tips To Level Your Travel Trailer
There are a lot of right ways to level a travel trailer.
Many of the suggestions I list simply evolved out of necessity from experience by boondocking on government land.
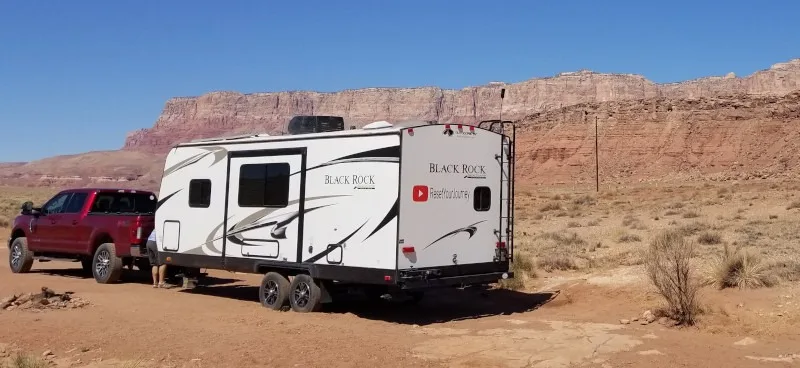
I discuss how to level a dual-axle travel trailer in this article. That said, leveling a single-axle or tandem-axle trailer requires the same approach.
For the most part, all of these suggestions will apply to fifth wheels too. If you have an auto-leveling system, some of these suggestions will still apply.
Bottom line, whatever you do to make your trailer level is fine pending the outcome is a level RV.
We wanted to sum up some methods that may help expedite the leveling process for you.
The following six leveling methods have served us well in our travels (and still do).
Numbers 3 & 4 explain how to get the RV level on a sloped driveway, steep driveway or any slope for that matter.
Why level your trailer? Not only is it better for sleeping, if you have a propane refrigerator, it requires a level surface to function properly.
Check out the video for clear explanations.
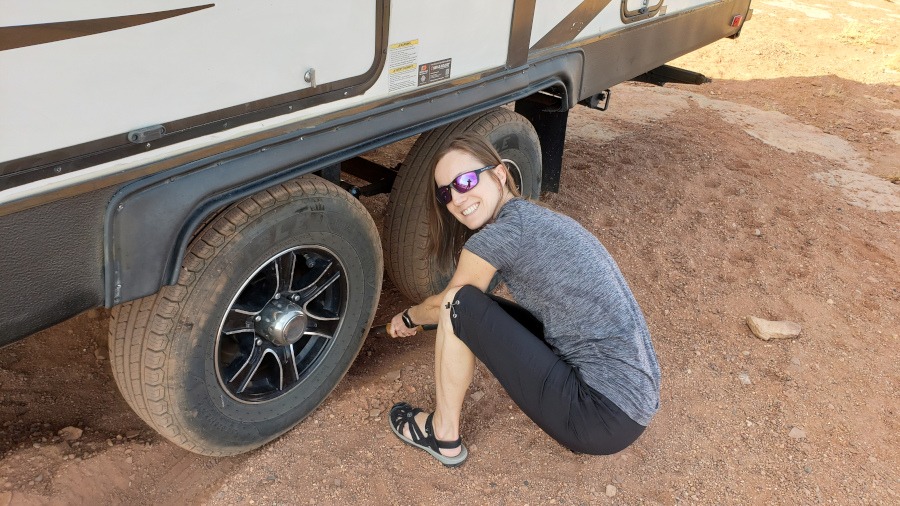
There’s More To It Than Just Wheel Levelers And Wood Blocks For Campers
- Establish definitive hand signals between the driver and copilot.
- Don’t be afraid to maneuver the trailer around the site to find level ground.
- When facing uphill, roll back on the Anderson levelers.
- When facing downhill, roll forward onto the Anderson levelers.
- Dig a trough or ditch under the wheels on the high side.
- Before uncoupling, place your tow vehicle in neutral briefly to release the tension.
Hand signals may not level a travel trailer, but they are a good idea for getting into camping sites without spousal/partner carnage.
They’re the first thing that should be mastered when leveling a travel trailer.
Campgrounds and RV parks are one thing, but BLM and National Forest land are a completely different animal.
There’s a lot more uneven ground, which requires a lot of manipulation.
And good hand signals can speed up the process of finding the most level spot within a site.
It doesn’t matter what the signals are, only that they are defined and agreed upon.
Why not use a cell phone? Well, yes use a phone if you have a signal. But most of the great spots we find have no signal or very poor signal.
Our weBoost helps, but it’s useless outside the rig.
So, the best way is to define hand signals before the first time you’re being directed into your parking spot.

This is the part where hand signals work so well. It can save a lot of time by just moving the trailer around the site to find the most level spot.
This may seem obvious, but with so many things to consider when pulling into a site, it’s often overlooked.
Oftentimes, one can maneuver the sides of the trailer enough to maximize a level position.
In fact, we frequently forgot early on and did more work than we needed to do.
Having bubble levels mounted to the outside of your trailer can also make a big difference with this particular tip.
This only applies if you’re using a “roll up on” leveling device that changes the degree of lift by going forward or backward. We happen to use Anderson levelers, which work great for our travel trailer.
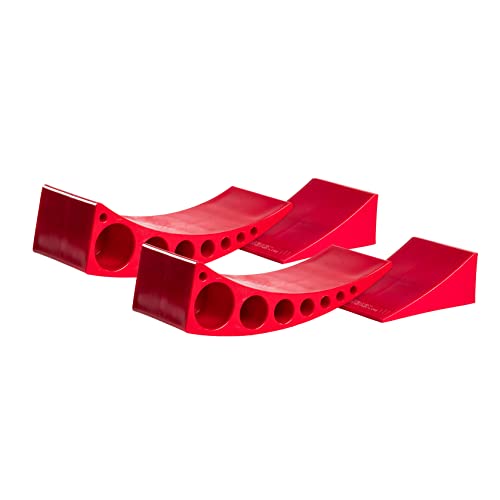
They don’t work for all trailers, so research before buying if you decide to go down that path.
Nonetheless, if the front of your trailer is facing uphill, set the levelers behind the tires on the lower side and roll back onto them.
In essence, this acts like a wheel chock behind the rear axle, preventing backward roll.
As importantly, it relieves some of the pressure on the tongue jack.
Any directional force that is large on the tongue jack increases your chances of the tongue jack slipping off its base.
If you’re already level surface side-to-side, then place an Anderson Leveler behind both the driver and passenger rear wheel and roll up onto them.
Next, place wheel chocks behind the front wheels on both sides of the trailer.
Finally, deploy your stabilizer jacks maximizing the upward pressure on the back of the trailer.
Use jack pads, wood blocks or plastic blocks under the stabilizers to minimize the distance between the frame and the ground.
You’ll encounter many situations where you’ll end up leveling a travel trailer on a slope, which is why we have to reverse this situation.
Now let’s look at the opposite situation since leveling a travel trailer on a slope can apply to facing uphill or downhill.
If the front of your trailer is facing downhill, set the leveler in front of the wheel on the low side and roll up on it by pulling forward.
Of course, if the trailer is level side-to-side, place the levelers in front of the tires on both sides of the trailer and roll forward onto them.
Again, this acts like a chock preventing forward roll. This releases the tension on the tongue jack stand as well.
Next, place your wheel chocks in front of the rear tires, preventing forward roll.
Finally, deploy your stabilizing jacks placing maximum downward force on the front jacks (front of the trailer).
The real jacks can just touch down to prevent a lot of movement.
If it’s a really steep slope, you’ll need more blocks under the tongue jack. The less you have to extend the jack, the better.
Even though this makes perfect sense, when we started, we still got it wrong on occasion.
Many of the times that we arrived at a site, we had been driving for many hours. And this translates into fatigue, which is where mistakes happen.
Again, a no-brainer when leveling a travel trailer side to side on soft ground. This is your best option. Sadly, we often forgot this in the beginning and spent a long time elevating one side.
So, travel with a small shovel (the right tools) to dig a trough under the elevated side.

It doesn’t take a very deep trench most of the time, so keep it shallow and test.
That way you can pull out of the trough and dig out or add a little bit back the appropriate amount of soil.
All of this said, if you are parked on a slope, use a combination of the Anderson levelers and a shallow trough.
For good reason, this is to help minimize the constant force on the tongue jack.
In other words, the trailer wants to stay in one place.
Kofa National Wildlife Refuge
This brings me to the last suggestion. When you lower your tongue jack with your parking brake applied, sometimes there’s still force on the tongue jack.
This can cause the coupler to get hung up on the hitch ball and then drop once the force is overcome.
It can be scary and sometimes moves the trailer jack off the base.
We experienced this when we were a new RV owner and then had to figure out how to get the coupler high enough to reach the hitch ball.
You can watch that in our first video titled “It Fell.” The video quality is subpar, but it delivers a clear message. No judgment, please.
So, before jacking the coupler off the hitch ball, take a moment to release the emergency brake with your foot on the brake and shift to neutral.
Then reapply the emergency brake and shift to park.
This relieves any pressure on the hitch ball and generally allows for a smooth lift off the hitch ball.
It’s a lot less scary and worth the thirty seconds required.
Not Sure What You Need For Your RV?
What Do We Think Is The Best Travel Trailer Leveling System?
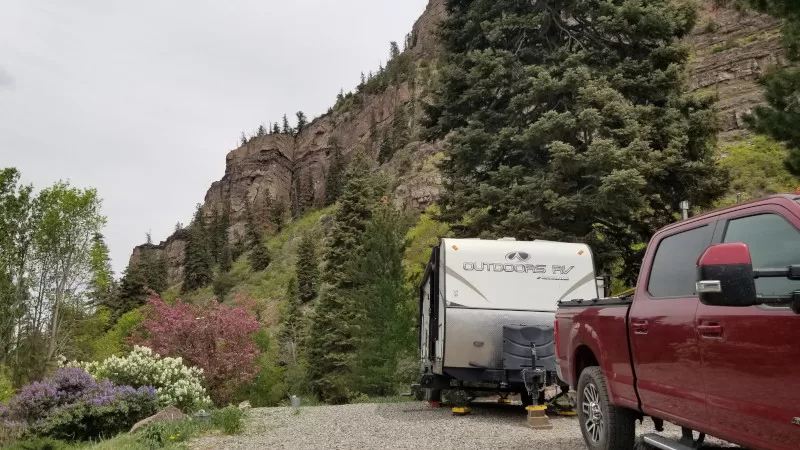
Beautiful Ouray, CO
After spending so much time on BLM land to thoroughly test our Anderson Levelers and watching other campers use different systems, we still think they’re the best.
It’s undeniable how easy Anderson Levelers are to use (and quick)!
They’re a lot better than just using plastic leveling blocks or concrete blocks.
Final Thoughts on Leveling A Travel Trailer
It’s worth the effort to memorize these tips to make sure you make it easier during stressful times.
And yes, many people are stressed after a long day of driving and getting into a difficult site.
Simply practicing these methods just a few times will make finding and leveling a site a total breeze.
Do you have any leveling tips to add?
Happy and safe travels!
Meet the author.
We appreciate any help we can get to bring you great content. Donate or buy us a coffee on our Ko-Fi site.