Last Updated on 05/06/2024 by Glynn Willard
Blowing Out RV Water Lines Vs Antifreeze
Using an air compressor vs the pink stuff during the winter months to prevent damage to your RV plumbing has some advantages.
But it also has some disadvantages.
Done correctly, both methods work well, so this comes down to two things.
What’s your personal preference?
And is it safe with your particular RV?
We’ve done both in our travel trailer depending on the circumstances.
The manufacturer of our campervan (Roadtrek) does not recommend blowing out the plumbing.
Let’s see which version will be best for you, your water pipes, and your holding tanks.
Types Of RV Antifreeze
There are two variations of RV and marine antifreeze, which we’ll cover in a moment.
Before we discuss the difference, it’s important to understand a couple of terms.
- Freeze Point: Ice crystals will begin to form long before long before the the burst point is reached. This is also known as the slush point.
Water in this state will not flow, but it’s also not yet expanding. You’re not in the “danger zone.” Not all companies list the freeze point (only the burst point), so look closely at the product. - Burst Point: This is the temperature most companies list on the label. It’s the temperature of a copper pipe filled with water (in our situation) that will burst.
It’s easy to look at a bottle that says -50 degrees F and assume it wont’s freeze until it hits that temperature.
But that’s the temperature at which a copper pipe will reach its burst point.
Generally speaking, RV antifreeze with a -50 degree F burst point will begin to crystalize at approximately 12-18 degrees F.
Make sense?
So when you see a review on a product complaining that it froze at 5 degrees F, that’s not necessarily an issue.
Also, bear in mind, PEX and PVC will burst sooner than copper for the standard burst point of RV antifreeze.
Now let’s examine the two variations of RV antifreeze.
Propylene Glycol
Propylene Glycol (PE) is on the Generally Regarded As Safe (GRAS) list, meaning it has little to no toxicity to mammals in small amounts.
And I assume, your intention is not to drink your RV antifreeze.
A PE/water solution has freeze protection down to -58 degrees F (-50 C).
Pure PE has a freezing point of ~ -74 F (-59 C).
PE with virgin chemicals is my go-to for the sake of safety and effectiveness.
That is of course when I actually use winterizing antifreeze on my RV.
Ethanol
Ethanol/water solutions also have freeze protection down to -58 F.
Pure ethanol has a freezing point of ~ -174 F (-114 C).
But pure ethanol in your plumbing system is dangerous!
It’s also a little easier on your water pump, but that’s negligible for our application.
The US EPA states, “Ethanol is also considered as a GRAS ingredient when used as a preservative.”
In other words, small amounts will not harm us.
But again, you’re not drinking your antifreeze!
Since it’s flammable, albeit low risk when diluted under the circumstances, I prefer to look for RV antifreeze predominantly made with PE.
Pros And Cons Of RV Antifreeze

For many, the pros and cons are both subjective and case-dependent.
RV owners have differing opinions, but both methods work.
So here are my thoughts:
- Pros: It’s easy to winterize with RV antifreeze and fairly inexpensive.
- Cons: The plastic container is wasteful, it’s sometimes out of stock, and although nontoxic, still not great for the environment.
Craving Video? Visit Our Channel

How To Use RV Anti Freeze
These steps are generalized. Both of the recreational vehicles I’ve owned had slightly different directions.
In other words, all RV’s are different. Follow your owner’s manual.
Also, the number of gallons of antifreeze is system-dependent.
- Dump your black tank and your gray water tanks.
- Turn off the main switch on the hot water heater. Bypass it if you have a hot water tank. Don’t bypass it if it’s tankless. Refer to the owner’s manual to be safe.
- Turn off your water pump.
- Dump your freshwater tank. If there’s a dump valve by the city water inlet, open that too, i.e., all of your low point drains.
- Close off the release valves to the fresh water tank.
- If you have a water heater tank (not tankless), remove the anode rod and let it drain. Use caution if it was used recently.
- Bypass your water filter if you have one.
- Some systems require you to pump antifreeze into your system and some require the addition of antifreeze to your freshwater tank.
- Turn on the water pump.
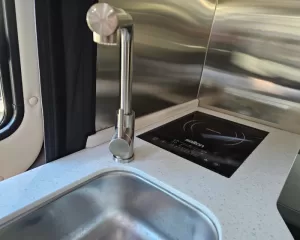
- Open the hot and cold valves on the kitchen sink faucet, bathroom faucet, indoor shower, and outside shower until the pink stuff flows through.
- Flush the toilet until the pink stuff flows into the toilet.
- Add a small amount of RV antifreeze to each sink/shower with a p-trap (drain traps).
- Briefly open the low point drains on your freshwater tank until pink is released and then close it off.
- If you have an inline macerator, run it until it also discharges pink RV antifreeze.
At this point, your rig is good to go for cold climates.
The Compressed Air Method For RV Plumbing System
This is my favorite method when applicable.
Even if you use compressed air, if you’re in really cold temperatures, you should still add some antifreeze to the p-traps and black and grey tank for peace of mind.
Let’s look at the pro’s and cons.
Pros And Cons Of Blowing Out RV Plumbing Lines
Some type of adapter will be necessary for any RV.
Just like RV antifreeze, for many, the pros and cons are both subjective and case-dependent.
So here are my thoughts:
- Pros: It’s less expensive, less wasteful, and fairly quick (if it’s not your first time).
- Cons: It requires owning an air compressor and you still should use some pink stuff in your p-traps and black/gray tanks.
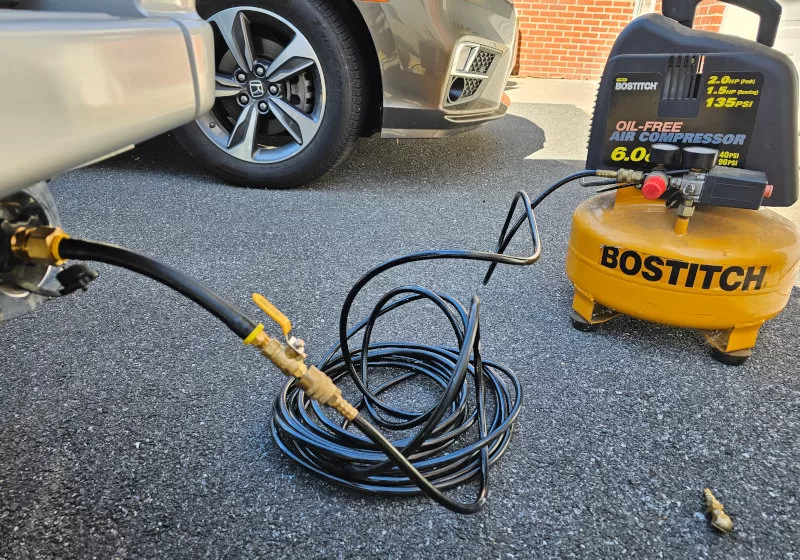
What Type Of Air Compressor For RV Winter Storage?
Any air compressor with a regulator will do this job.
You most likely have PEX lines, so your max air pressure cannot exceed 30psi.
I set mine around 28psi and it works fine.
You’ll also need an RV blowout adapter for your air compressor. They’re inexpensive and readily available.

Yes, the image is an affiliate link to make it easier for you to know what I’m talking about.
How To Blow Out Your RV Water Systems
Please allow me to preface this section that many different plumbing systems exist within the RV industry.
Make it a priority to consult with the manual and other RV owners with the same brand/model before blowing out your lines.
Our Outdoors RV had a very simple plumbing system and was easy to winterize by blowing out RV’s water lines.
But our Roadtrek is more complicated and it’s not recommended by the manufacturer.
Regardless, here are the general steps to follow on a simple RV plumbing system.
- Dump your black and gray holding tanks until empty (at a dump station).
- Pull the drain valve on the fresh tank until it’s empty.
- I like to turn the pump on once the freshwater tank is empty and draw any remaining water through each faucet into a tote bin to toss outside.
- Make sure your water pump is turned off.
- If you have a water heater tank, release the pressure first, then pull the anode rod out to let it drain.
- Set the bypass valves to bypass the water heater once it’s empty.
- If you have a tankless water heater, check the manual first for specific directions.
- This is also the time you bypass and remove the water filter system in your RV.
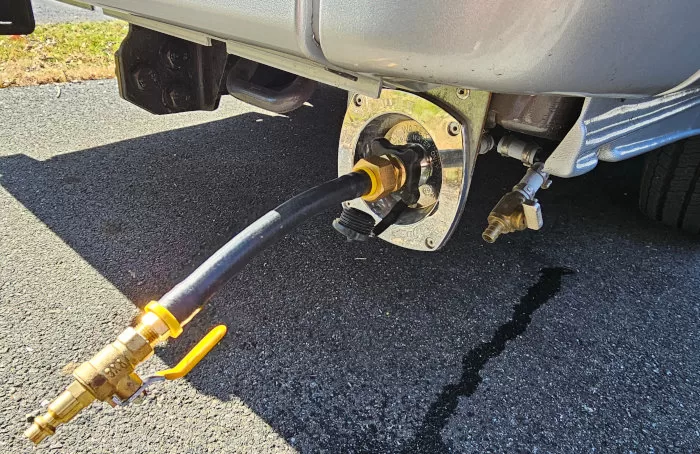
- Attach your blowout plug to the city water connection and attach the air compressor.
- Before releasing 30psi into the plumbing system, open the closest faucet (hot water) to the city water intake.
- Open the valve to allow compressed air into the system.
- Once no more water sputters out from the hot water side, open the cold and close the hot.
- Repeat this process with the bathroom sink, shower, outdoor shower, and any other water faucets in your RV.
- I tend to cycle through the faucets twice to get that last little bit of water out of the system.
- Remove the air compressor, and return bypass valves to normal.
- Pour a small amount of RV antifreeze into the p traps for the sinks and shower drain.
- Add a little antifreeze to the toilet bowl without flushing it to prevent the seal from drying out.
- You’re RV is winterized and good to go until you’re ready to roll out next spring.


Not Sure What You Need For Your RV?
What’s Our Personal Preference For Cold Weather?
We used to RV full-time, so we rarely needed to winterize our RV.
Now we’re part-time and still rely on our freshwater tank for drinking water, so we prefer to blow out our plumbing system.
It takes me about 20 minutes from start to finish and costs almost nothing.
I’m also not dependent on the availability of RV antifreeze at the hardware stores or Walmarts.
This, of course, doesn’t apply in our Roadtrek (until the warranty expires).
What method do you prefer to use to winterize your RV?
References
Schoppa, Wade, and Michael K. Ewert. “Freeze-Protecting Fluid Selection for Internal Thermal Control Systems.” SAE Transactions, vol. 107, 1998, pp. 954–65. JSTOR, http://www.jstor.org/stable/44735820. Accessed 28 Feb. 2024.
Meet the author.
We appreciate any help in bringing you great content. Donate or buy us a coffee on our Ko-Fi site. Or subscribe to our YouTube Channel.
Thank you so much for being here!