Last Updated on 05/06/2024 by Glynn Willard
What Is The Black Tank On An RV?
The black tank, also known as the septic tank on a recreational vehicle is specifically designed to hold human waste.
It’s one of the two tanks on most RVs for storing waste water while dry camping or traveling.
The gray water tank is a separate tank that stores water from the bathroom and kitchen sink as well as the shower drains.
Let’s “dive in” to best practices, proper maintenance, and operation of an RV’s black water tank.
Okay, let’s agree not use the phrase, “dive in” and “RV black water tank” in the same sentence again.
I’m using affiliate links and photos to make it easier for you to a) know what I’m talking about and b) help you make an informed decision. We also appreciate the small commission that does not cost you any extra.
A Quick Refresher On RV Holding Tanks
Most RVs have a freshwater tank, a grey tank, and a black water tank.
Although, some smaller RVs, such as class B campervans use a cassette toilet instead of a black tank.
A brief review:
-
Freshwater tank:
The fresh water tank contains your potable water for drinking, cooking, showering, and cleaning dishes.
Most fresh water tanks hold anywhere from 10-150 gallons of water.
Please make sure you always fill this with clean water. Contaminated water requires sanitizing your freshwater tank before using it again. -
Grey water tank:
The grey tank holds your waste water from the bathroom and kitchen sink and shower.
In some parts of the country, you’re allowed to dump your grey tank on the ground. I’m not a fan of doing this.
Besides, you need gray water in the tank to flush the RV sewer hose after pulling your black tank valve. -
Black water tank:
The black water tank holds human solid waste until you dump it at an RV dump station or a campsite with full hookups.
RV Owners Guide To Black Tank Operaton

There are a few highlights to getting the most out of your black tank. I really need to rephrase some of these sentences!
Let’s keep it simple. Different Amp Services At RV Sites
- It’s more than just a good idea to allow your black tank to fill as much as possible before emptying.
This prevents “poop pyramids” and creates a large bolus of dirty water to carry out immiscible contents. - If you don’t have a tank cleanout connection, run water through your toilet after dumping your black tank.
Dumping additional water down the toilet will help flush out any remaining solids. - Of course, always pull your black water tank valve first, then flush your black tank, followed by releasing your gray tank valve.
- Finally, after dumping, add about a half gallon of fresh water to the black tank. This is a good idea to add a treatment of your choice (if you like).
There are also a few necessary maintenance steps to keep your black tank functioning properly.
Craving Video? Visit Our Channel

Proper Maintenance Of Your RV’s Black Water Tank
Seriously, none of these steps or maintenance procedures are difficult.
- As I mentioned earlier, allow your black tank to fill as much as possible before dumping.
- If you have a cleanout system on your RV, use it every time it’s available at a dump station. Please do not use your freshwater hose for this step.
- If you don’t have a cleanout system, run fresh water down the toilet until all solids are flushed out. A clear elbow on the end of the hose helps.
- Another option is to use a Camco Swivel Stick, which will spray water against the sides of the black tank to help remove debris from the tank sensors.
We don’t use one, but our tank sensors stopped working on our travel trailer a long time ago. Perhaps we should use on on our campervan to prevent any issues. - We’re not fans of RV-specific toilet paper, so instead, we use regular toilet paper and dispose of it in a flip-top trash can next to the toilet.
It never smelled bad and likely prevented any clogging problems with our black tank. - There are a lot of opinions about RV tank treatments, so here’s my two cents.
If you clean your black tank frequently, you don’t need to spend a lot of money on enzymatic treatment solutions (technically precipitates).
We started using a combination of Dawn dish soap and Borax in our black tank and never had any odor issues.
The more I thought about it, the more I realized that the least expensive option is to simply add about 1/2 cup of Borax to the 1/2 gallon you add after dumping.
This raises the pH and “basically” softens the solids in the tank, making them more miscible.
This translates into less solid waste remaining in your black tank after dumping. Again, a good bang for the buck. - How often should you clean your black tank? The simple answer. Every time you dump your tanks.
Of course, if there’s a line of RVs waiting behind you, either use the quick “water down the toilet” method or wait until next time. Just make sure you’re doing it on a regular basis.

Black Tank At An RV Campground With Sewage Hookups
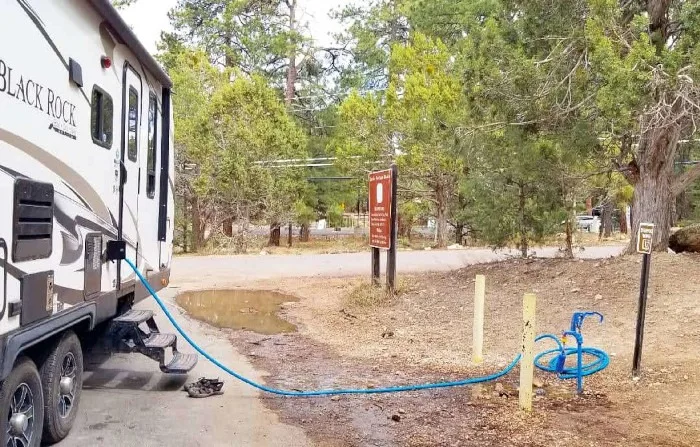
If your next camping trip involves a campsite with a sewer connection, connect your septic hose during your RV setup.
But instead of leaving your dump valve open, keep it shut until your tanks are at least half full.
Then pull the dump valve on each holding tank either daily or every other day depending on the number of people and total usage.
A note of caution. If you’re connected to city water, keep an eye on your tank levels.
You have an endless supply of fresh water, but not infinite storage capacity.
RV Holding Tanks At A Dump Station
There are a few important points to highlight about using a dump station regardless of whether it’s at campgrounds, rest areas, or truck stops.
- First, if there’s a line, don’t dilly-dally. This is also not the time for your “annual super black tank cleanout.”
- If you’re a well-seasoned “dumper,” offer assistance to anyone who looks as though they’re confused.
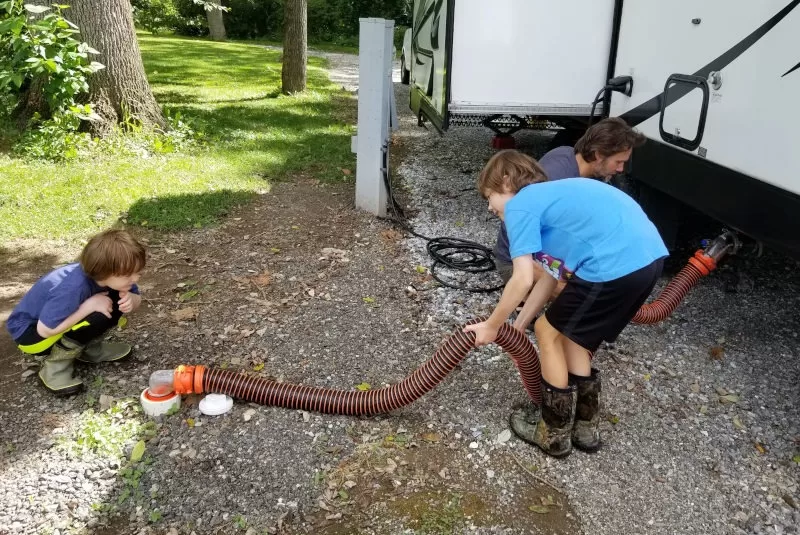
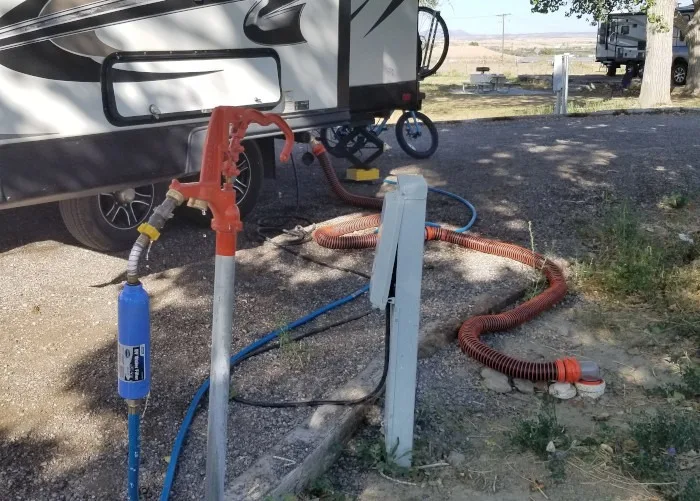
- Make sure your septic hose is securely fastened to your RV’s holding tank’s gravity drain before opening the valve.
- Use only the red-handled spigot to flush your tank or clean your drain hose. Please do not use water that’s labeled “potable” to clean your drain hose or flush your tanks.
- Finally, when you’re done, rinse the area around the sewer hookups, so it’s clean for the next user.
You can read more about finding dump stations and dump station etiquette in our article: How To Find RV Dump Stations Near You Easily (Guide)
What If Your RV Has A Macerator?
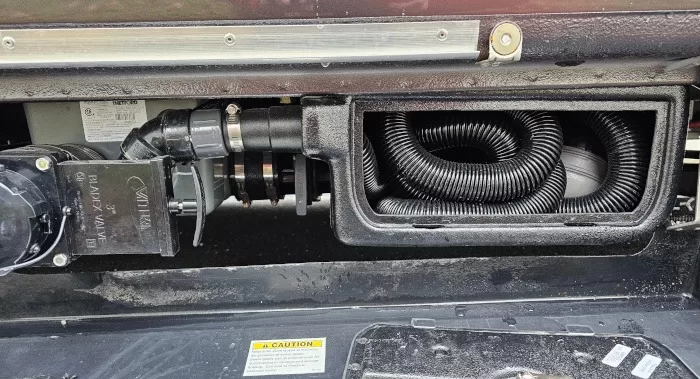
Our campervan is equipped with a macerator.
Many newer camper models incorporate an inline macerator for dumping your holding tanks.
Our campervan has one and it’s a lot of fun. Okay, perhaps a poor description.
What is a macerator? It’s a nifty device with blades that break up and soften solids in your black tank. Exciting, right?!
You can buy them as an aftermarket product for your RV.

The benefit of having a macerator can be summed up with these ten words. They turn solid waste into liquid, making it flow better.
The pump portion of the macerator allows you to dump your tanks into a cleanout that’s much further away from your RV.
I believe the most relevant benefit is it allows you to dump your tanks directly into your home’s septic clean-out.
How do you use a macerator?
- Once the macerator is connected in line with the holding tank’s output, pull the black water tank valve.
- Then switch the macerator on until the tank is empty.
- Close the black valve and turn off the macerator.
- Add additional water to the black tank and repeat the above steps.
- Open the gray tank valve and immediately turn on the macerator until the gray tank is empty.
- Close the gray tank valve and turn off the macerator.
- Rinse off the end of the macerator hose with the water hose supplied by the dump station. Not the potable water hose.
It’s that simple!
Again, I believe our (personal) biggest advantage is the ability to dump our tanks directly into our home’s sewer clean-out right next to the driveway.
Not Sure What You Need For Your RV?
Wrapping Up Your RV Black Water Tank
It doesn’t matter if you’re a full-time RVer or a weekend warrior, proper use, care and maintenance of your black tank is the easiest way to prevent future problems.
Black tank repairs or a replacement is a costly endeavor for any RV owner.
The most important takeaways from this article are:
- Dump your black tank first, allowing the water from the gray tank to clean out the septic hose.
- Allow your holding tanks to fill at least halfway before emptying to create enough pressure to push all the contents out of the tank.
- Clean out your black tank with the RV’s cleanout system, by dumping additional water down the toilet or with a swivel stick every time you dump the tank.
Use the quick “water down the toilet” method if there’s a line behind you. I just hold the flush pedal in allowing water from the freshwater tank to run through the black tank.
I always do that before refilling the freshwater tank. - If you stay on top of your maintenance, using Borax in the black tank is usually enough to prevent clogs and minimize odors.
How do you care for your RV’s septic system?
Meet the author.
We appreciate any help in bringing you great content. Donate or buy us a coffee on our Ko-Fi site. Or subscribe to our YouTube Channel.
Thank you so much for being here!